Tuesday, November 12, 2024
How to Build an Insulated Cold Frame for Winter

Build an Insulated Cold Frame for Winter
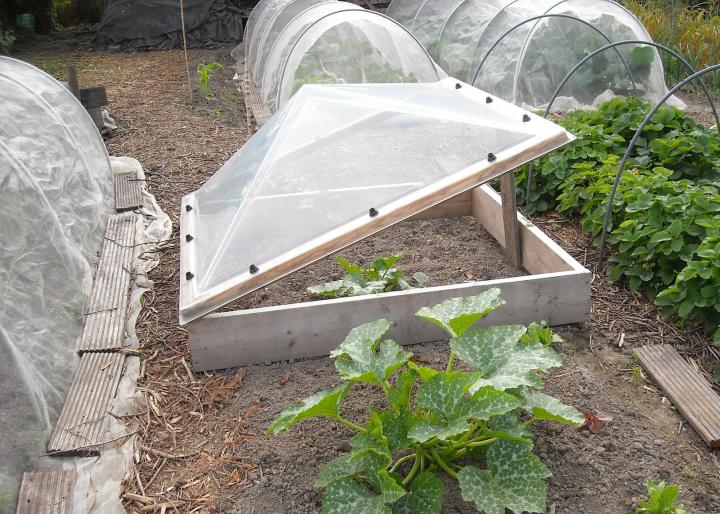
Extend your gardening season and enjoy fresh produce even in the depths of winter by building a well-insulated cold frame. This structure, essentially a mini-greenhouse, harnesses the sun's warmth and traps it, creating a microclimate perfect for growing cool-season crops.
Here's a comprehensive guide to building your very own insulated cold frame, ensuring a successful winter harvest:
Choosing Your Cold Frame Materials
Selecting the right materials is crucial for building a sturdy and effective cold frame. The most common options include:
Frame:
- Wood: Durable, readily available, and easy to work with. Pressure-treated lumber resists rot and insect damage, ideal for outdoor use.
- Metal: Aluminum or galvanized steel offer long-lasting durability, but may require more specialized tools and techniques.
- PVC: Lightweight and water-resistant, making it a good choice for less demanding structures.
Glazing:
- Glass: Provides excellent light transmission and insulation, but is fragile.
- Polycarbonate: Lightweight, impact-resistant, and offers good insulation, a popular choice for cold frames.
- Acrylic: A durable, clear alternative to glass with good insulation.
Insulation:
- Expanded Polystyrene (EPS): Affordable and effective, easy to cut and shape.
- Fiberglass Insulation: Offers good thermal resistance, but can be more challenging to work with.
- Straw or Hay: A natural and readily available option, but requires regular replacement.
Steps to Build Your Insulated Cold Frame
1. Plan Your Cold Frame Design:
Determine the size and shape of your cold frame based on your available space and desired crops. Sketch a simple plan to guide your construction.
2. Construct the Frame:
Cut the frame materials according to your plan and assemble them using screws or nails. Ensure the frame is square and level. If you're using wood, consider adding a layer of weather-resistant paint or sealant.
3. Add Insulation:
Attach your chosen insulation material to the inside of the frame. Use a strong adhesive, staples, or clips to secure it. For EPS, you can create a snug fit by cutting it to the exact dimensions of the frame.
4. Attach Glazing:
Secure your glazing material to the frame, using specialized glazing clips, screws, or a combination of both. If using glass, ensure proper sealing to prevent drafts.
5. Add a Base and Lid:
Create a base for your cold frame using bricks, pavers, or wood. This will elevate the structure, providing better drainage and insulation. Build a hinged lid that allows easy access for planting and tending.
6. Choose a Location:
Position your cold frame in a sunny, sheltered spot. Consider a south-facing location for optimal sunlight exposure. Ensure the soil in the location is well-drained.
7. Prepare the Soil:
Fill the base of your cold frame with high-quality potting mix or amend existing soil with compost. Make sure the soil is loose and well-aerated to promote root growth.
8. Start Planting:
Plant your chosen cool-season crops like lettuce, spinach, kale, or radishes. Adjust planting dates based on your local frost dates and the specific needs of your crops.
9. Monitor and Adjust:
Pay close attention to the temperature and humidity inside your cold frame. You may need to vent it on sunny days to prevent overheating. Regularly check for pests and diseases.
Tips for Using Your Insulated Cold Frame
- Consider using a heat mat: This can be helpful for starting seeds or extending the growing season even further.
- Add a layer of mulch: A layer of straw or shredded leaves on top of the soil can further insulate the cold frame.
- Use a cold frame thermometer: Regularly monitor the temperature inside the cold frame to ensure optimal conditions for your plants.
- Ventilate on sunny days: Opening the lid during the day can help regulate temperature and prevent excess humidity.
- Clean your cold frame regularly: Remove any accumulated debris or dead leaves to prevent mold growth.
With careful planning and construction, your insulated cold frame will extend your gardening season, allowing you to enjoy fresh produce even in the coldest months. Enjoy the satisfaction of harvesting your own winter vegetables!
No comments:
Post a Comment
Note: Only a member of this blog may post a comment.